Here is how to save emails to Sharepoint with our Chrome extension:
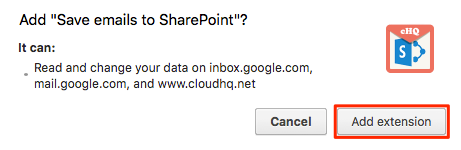
- Install the cloudHQ Chrome browser extension Save emails to Sharepoint from the following location: https://chrome.google.com/webstore/detail/save-emails-to-sharepoint/agnpcapgpaddkjljgamlbnbnobagghbf/:

- Add the extension to Chrome so you have the “Save to Sharepoint” button in your Gmail or Google Apps mail:
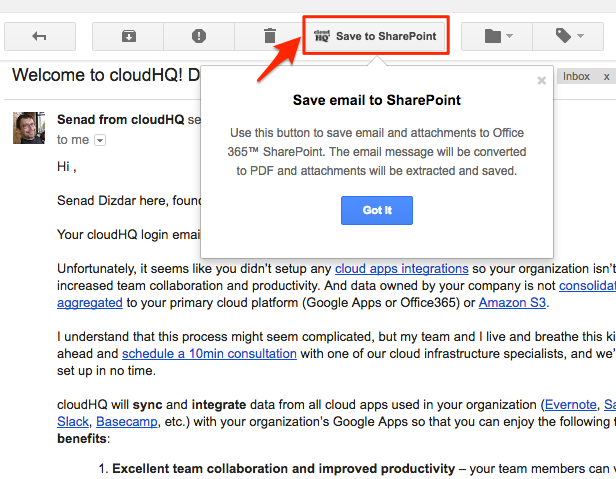
- Open your email and click the “Save to Sharepoint” button in your Gmail™ or Google Apps mail:
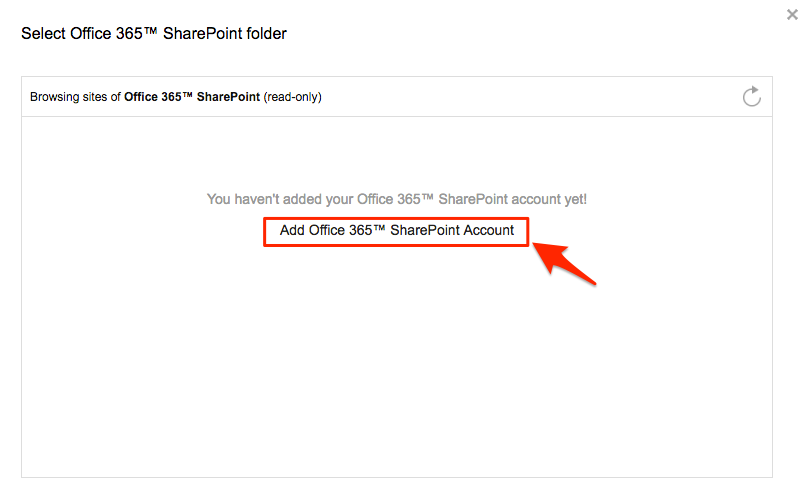
- Click “Add Office 365 Sharepoint Account”:
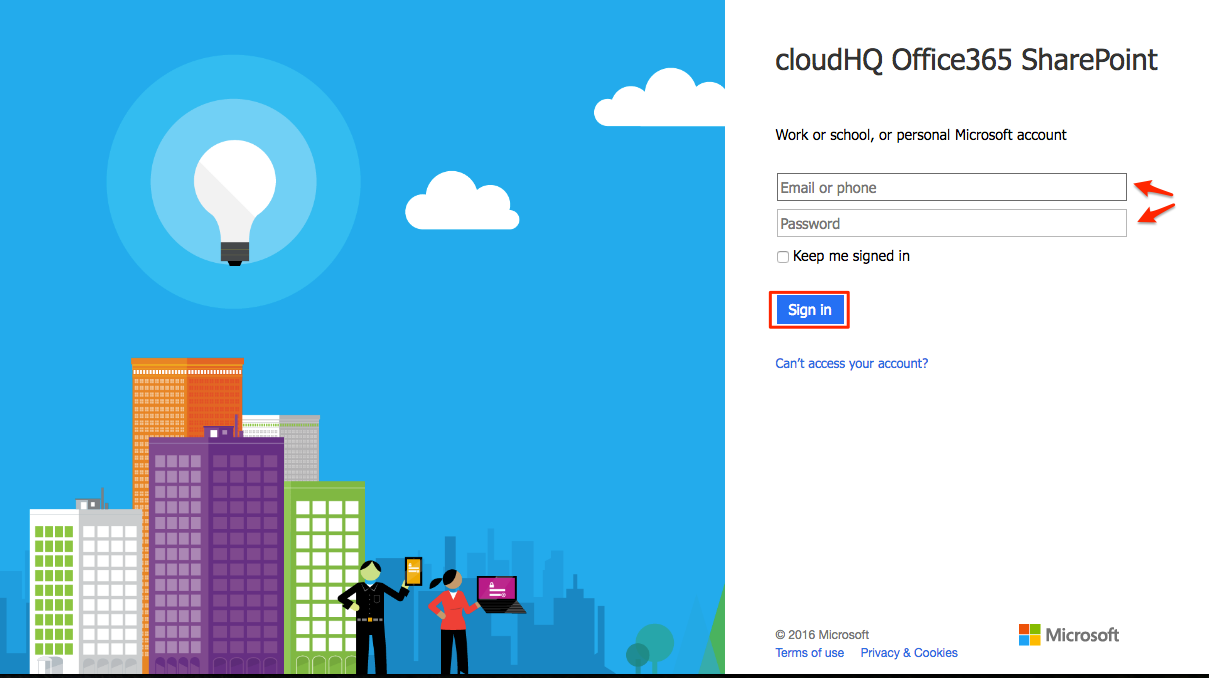
- This will display for a few seconds, then automatically redirect to Sharepoint:

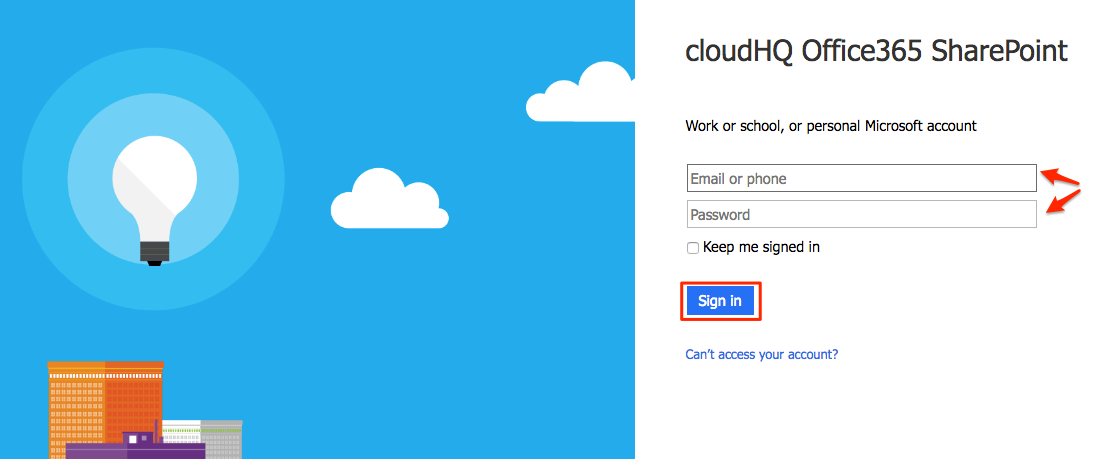
- Sign into your Sharepoint account:
- Authorize cloudHQ in Sharepoint:

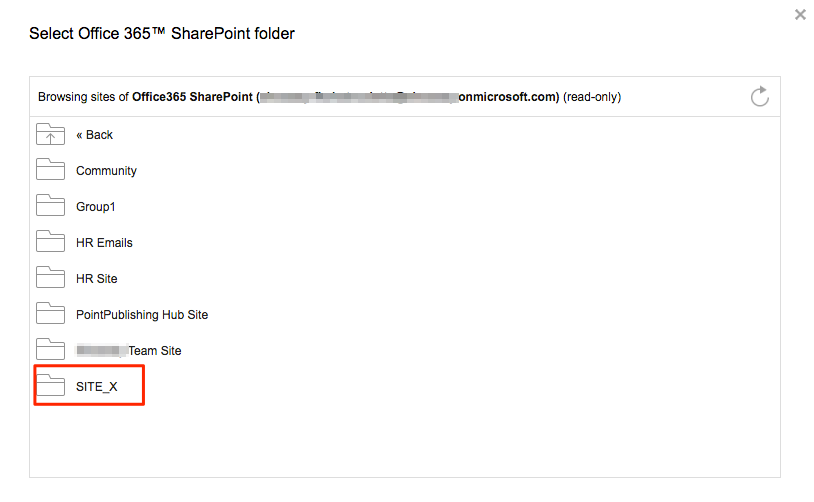
- Select the Sharepoint site folder where you want to save your Gmail or Google Apps email:
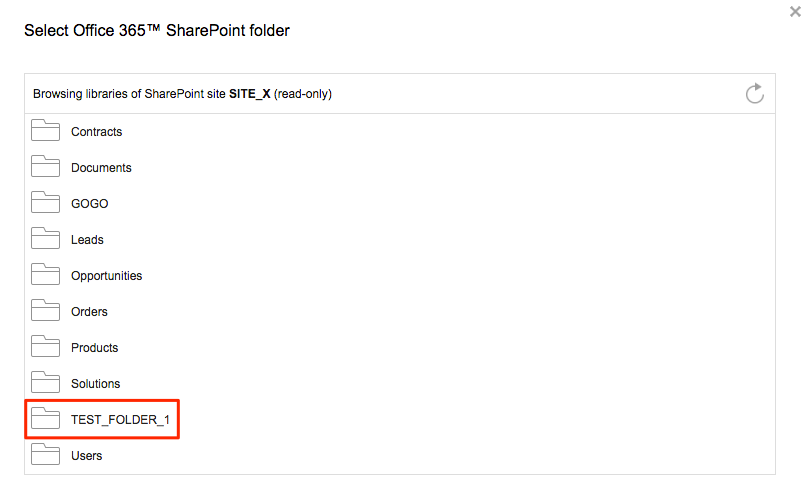
- You can also select a subfolder in Sharepoint:
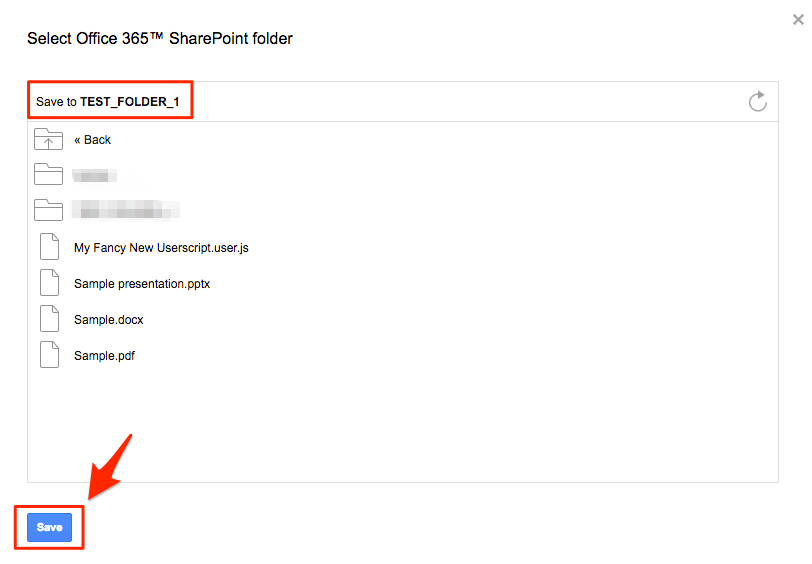
- Click “Save” once you have chosen the location in Sharepoint site where to save:
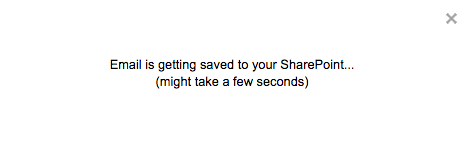
- You will get message that your Gmail or Google Apps email is being saved to Sharepoint:
- Your email is now saved in Sharepoint. Click “this” if you want to check in Sharepoint:
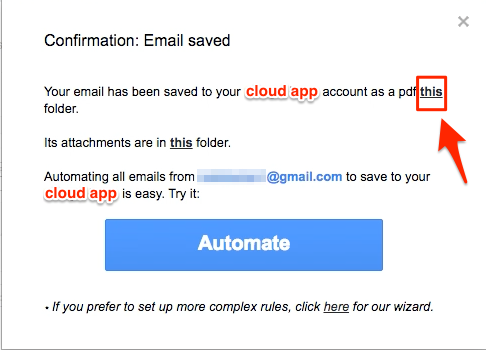
- If you click “this” you will be redirected to Sharepoint:
- You must login with credentials in Sharepoint to view your saved email:
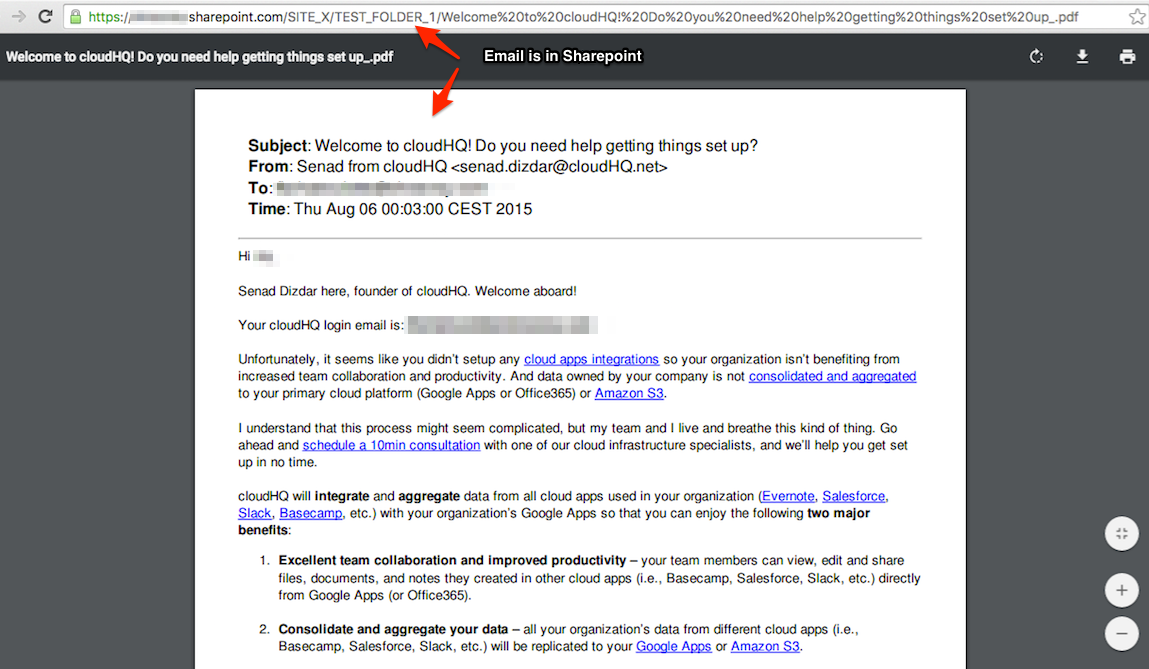
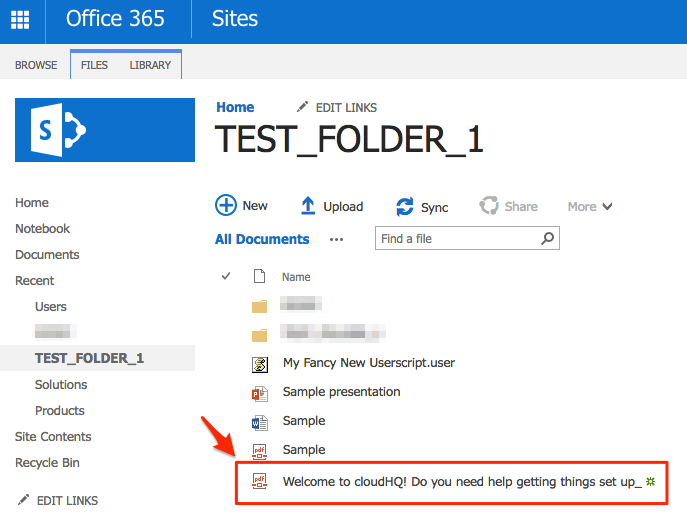
- Your Gmail or Google Apps email is now in Sharepoint:
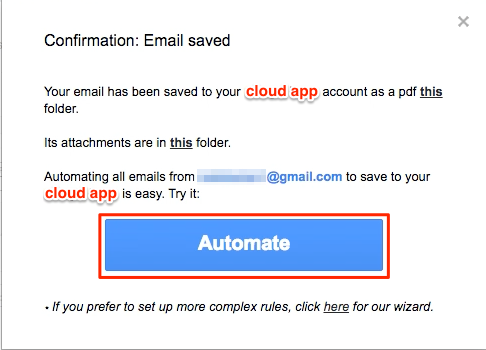
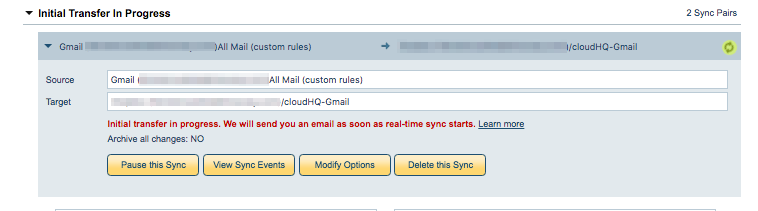
- Once the email has been saved to your Sharepoint, you can also click “Automate” button. Clicking this will create sync pair that will automatically save emails from sender to your Sharepoint:
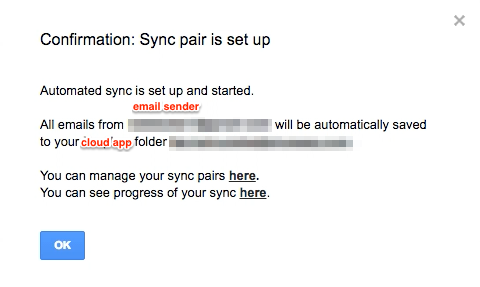
- A message will appear that sync pair is being created:

- A sync pair will be created to save emails from sender to your Sharepoint in previously selected location folder:
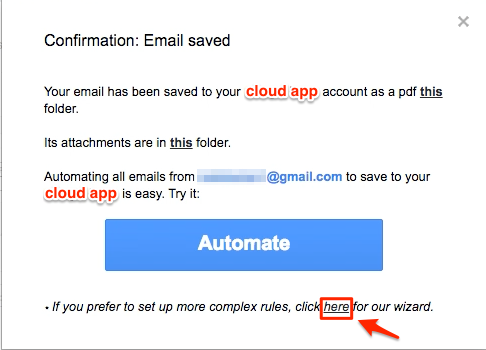
- If you want to customize the sender, recipient or email subject, you can click “here” instead of “Automate” button to customize email filters:
- You can specify rules on how your sync pair will be created:
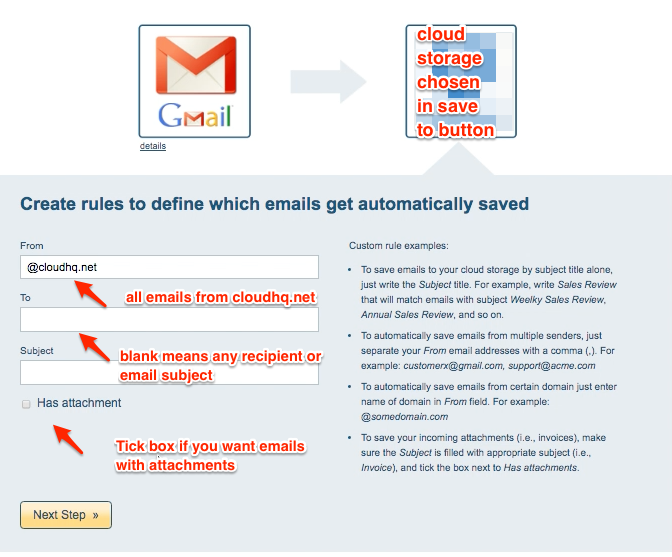
- You can proceed on succeeding steps in the creation of sync pair until created:
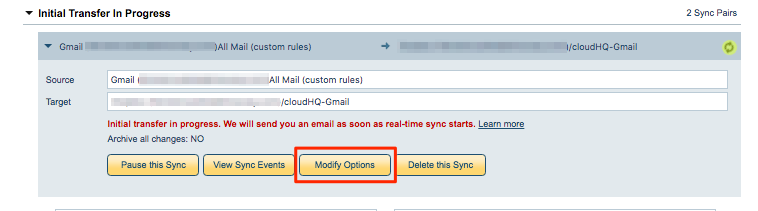
- If you still want to modify Gmail rules after sync pair has been created, just click on “Modify Options” to change options:
- Synchronization will start – Here is How to Monitor Status of Sync
- An email will confirm success of initial synchronization
If you get this notification, it means you will need to authorize Sharepoint:
Then go back to your email and click the “Save to Sharepoint” button: